Showing posts with label Organizing. Show all posts

Tuesday, January 26, 2016

Five Organizing Projects that Flopped

Alright, friends, it's about to get real up in here. Like, real people living real lives with real kids with real busy schedules, kind of real. No pretty, styled pictures today!

Last week, I showed you our top 5 organizing projects that actually worked and stood the test of time. Check out that post if you haven't already and burn the images in your brain, because you'll want to remember them after you see the pictures I'm about to show you. ;)


So, without further adieu, here's five organizing flops from around our house as well as my thoughts on what went wrong and what we're going to do about it. Be sure to check back over the next couple months to see how we remedy the problems!

#1- Under the Kitchen Sink

When we first organized under the sink, we put in a large basket for dish towels, two baskets for napkins and bibs, and a wire shelf for baggies. Not too bad for a cheap storage solution, right? Heh...

What went wrong? The gray basket was too small and is constantly overflowing. It was literally the biggest basket that would fit, so I tried to make it work. But, ultimately, it's too small. The little baskets are the same story. They're too small and hard to access, especially when they're overflowing. The shelf is too long, restricting the gray basket size and slides back and forth causing the baggies to fall everywhere.


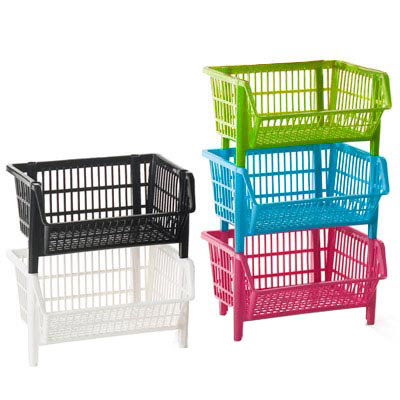
What are we going to do about it? For this space, I think stackable storage baskets that actually fit the space is what we need. I'm thinking either of these would do the trick nicely! 

#2- Winter Accessory Storage

I'll be honest, this one surprises me. Back when I was pregnant with Little Girlie, I was overdue and nesting and threw this hanger and Command Hooks onto the back of the coat closet door to store our winter accessories. It wasn't pretty, but it worked other than having to swing the scarves in as you were closing the door. Because it was working pretty well, I finally broke down and bought an official scarf organizer at Ikea thinking now I'd have more room for scarves and wouldn't have to do any maneuvering to get the door shut. Wrong. It's worse now and driving me nuts!

What went wrong? First, I have accumulated too.many.scarves. I need to purge. Second, not all of our gloves have clips to hang them with, so they get shoved into the bottom of the coat closet. I recently reorganized the coat closet and repurposed the hat basket for wrapping paper storage thinking I could store the hats on the scarf holder. Dumb move! The hats fall off all the time. 


What are we going to do about it? We need two designated baskets on the back of the door to toss gloves and hats into as well as some type of storage for my scarves after I pare down my collection. I'm thinking an over the door Elfa rack would be a great way to go! I like this one, minus the jewelry part.

#3- Kids Schoolwork Storage

I love the boxes I bought for Little Man's schoolwork, the bulletin board is great for displaying masterpieces, there's a paper tray for blank paper, and a mounted paper file for finished work. Each piece is useful and well thought out and we love them. 

So, if we love it so much, what in the world went wrong? This one goes to show you that organizational pieces are useless without a good, established organizational process. Instead of putting completed schoolwork into the "Inbox" and adding favorite pieces into the "Pre-K" box, the papers landed on the desktop because many of them were to finish at home or because I was in a hurry and simply didn't take the extra two seconds to put it in the box. Another reason they ended  up on the desktop is because there is a "waiting period" before papers can disappear, if you know what I mean!

The desk organization didn't work because I didn't spend the time to practice the process with Little Man. He creates several drawings a day, so the papers pile up quickly and in just a couple days the desk and paper trays are literally overflowing. Everything is a masterpiece to him, so getting rid of a papers is hard for him. And, he's 5. There's definitely that factor. :)

The left is the "messy" picture. Thankfully, even though the boxes are completely full and I've started a pile on top, it's not terrible looking yet. The right picture is a picture showing the paper tray and file that I rummaged up. I wish I had a real, messy picture for you, but I just recently helped Little Man go through all of his papers. 


What are we going to do about it? I've been working with Little Man, helping him keep up with his desk and remembering where to put things when he's done. The more we practice, the more it will become second nature to him. I've also been working with him, helping him understand why we can't keep every.single.piece.of.paper that enters our home and helping him purge. He threw away a paper from school the other day and I was so proud of him. It was just a paper that he had glued things to, so there was no sentimental value. The fine motor skill practice was accomplished, so there was no reason to keep the paper anymore and he recognized that. Progress! We also cleared the bulletin board and hung up a new slew of masterpieces that he's super proud to display! 

As for the boxes, I need to break my habit of dumping his papers on his desk and sort them as they come in. Basically, I need to buckle down and use the storage correctly! :) Anyone else get storage solutions and then not use them correctly? Anyone? Crickets?!

#4- Playroom Closet Shelves

Oh boy, this one is bad... Remember our gorgeous closet? Well, the three middle shelves don't look like that anymore, that's for sure. Whomp whomp. 

What went wrong? In a nutshell, it's totally my fault. We moved the printer to the office and I stole the baskets for my dining room cabinet, so suddenly I had shelves of random stuff and no storage bins to contain it all. This closet holds a bunch of random things which makes is so hard to organize. Party supplies, craft supplies, stationary, a file system, coloring books, kids toys, art supplies, camera accessories, electronic cords and accessories, board games, holiday decor... you name it, this is the closet it lives in. Now take that list of stuff and try to organize it using reusable shopping bags you have on hand and this is what you get. A hot mess. Honestly, though, we didn't have the money at the time for new baskets, so we didn't buy baskets. Then, we forgot to add baskets to the budget priority list and this mess is a result. I guess it was out of sight, out of mind?


What are we going to do about it? Get bins! I'm thinking of the same bins that I mentioned for under the sink because they are stackable and the contents are easily accessible without taking the entire bin out. Thankfully, the rest of the closet still looks great, so a few bins and we should be back in order!

#5- Breakfast Nook Basket 

After we installed our favorite shoe cabinet, we popped a cute basket on top for things like keys and sunglasses that we access as we walk in or out the door. However, looking at the bottom picture, you'll notice that keys and sunglasses aren't anywhere to be found in the heaping mess! This one may seem insignificant, but you'd be surprised how much a messy basket can make the entire breakfast nook look cluttered! 

What went wrong? The basket quickly became a place to toss receipts or notes. Then, because our garage is detached, it became the holding spot for tools or hardware/supplies as they came in or were ready to leave the house. At that point, it was messy already, so it further devolved into a spot to put things for Jeremy to sort. It spiraled out of control quickly and hasn't been neat since. 


What are we going to do about it? There's a couple things that need to happen to fix this problem. First, just like I have folders in my mail sorter slots for receipts and coupons, I need to make folders for Jeremy's mail slots, too, so that all of his papers have a clear home. Second, we need to stop making this a holding spot for things that belong in the garage! We have a bin for tools in the playroom cabinet, so we need to start adding project supplies from the garage to that bin while we're working on something instead of letting them pile up in the basket. 


There you have it! My Top 5 Organizing Flops! Do you have any organizing flops around your house? Spill the beans, I'd love to hear about them!

Don't forget to check back on Thursday to see how I framed our DIY Lettered Wood Sign!

Tuesday, January 19, 2016

Top 5 Organizing Projects That Actually Work

Have you ever seen a great, new organization idea, but then wondered if the new system or solution worked long term? I've shared my fair share of organizational projects here on the blog and am going to give you the scoop. The real scoop. The nitty gritty on what worked and what didn't.

Today I'm sharing the top 5 organizational projects I've done around my house that actually worked. And, I'm not talking about worked for a week. I'm talking long term, tried and true favorites. Then, next week, I'll be back to share which projects didn't stand the test of time. Or just simply didn't hold up to distractable me! Ha! So, stayed tuned to hear about my flopped organizational attempts!

Let's get into the successes! Here's my top five in no particular order!

#1- Breakfast Nook Shoe Cabinet

I heart this shoe cabinet! I knew this IKEA cabinet would be a great fit for our breakfast nook soon after we moved in, but the finances weren't right to be spending money on it. I waited for three years for it to creep its way up on the budget priority list. That also meant that I was three years sure I wanted it and it would be a good solution to our shoe storage issues. I LOVE it so much! It holds a ton of shoes and looks stylish while being super practical. I can't recommend it enough!


#2- Hallway Command Center

I have never blogged our command center even though I've had it on the wall in our hallway for as long as we've lived here. Time to remedy that because this spot in the house keeps me organized with our appointments and commitments. In our old house, we had a simple wipe-off calendar on the fridge and it helped me keep up with our schedule better than anything else! I was super disappointed that our fridge in this house is not magnetic so I couldn't continue my fridge calendar. Thankfully, we had the perfect spot in the hallway for a wall wipe-off calendar as well as a little white board for notes and pinning up reminder cards and stamps. Jeremy and I both use and update the calendar, so it's the best way to sync our schedules.

Last year, I hung our Christmas cards with mini clothespins and twine above the calendar. I loved seeing our family and friend's smiling faces there and ended up leaving the photo cards up all year long! I did the same thing this year and it always brings a smile to my face!


#3- Dining Room Teal Cabinet

The teal cabinet has gotten quite a bit of publicity on this blog, but for good reason! With no pantry, this cabinet is a major workhorse for us, storing all of our breakfast foods and snacks. We use it all day long and love it! Bonus points, it is absolutely adorable!


#4- Cabinet Door Organizer

This is by far the simplest organizing solution to make the list, but sometimes simple is what you need, right? A couple years ago, we attached this cabinet door organizer to one of the cabinets under the sink and it has worked great for us! It keeps our wraps and bags accessible without taking up precious drawer space.


#5- Playroom Book Ledges

I LOVE the book ledges we built for the playroom. The ledges allow the kids to see the books at a glance, get them down, and put them back completely independently! So very nice! I love that my kids can be responsible without needing any assistance from me. Win!


What are your best organizational projects? I'd love to hear about them or see links to your posts! 


Thursday, January 14, 2016

Bathroom Countertop Tray


Hey Friends! I seriously miss you all when I haven't gotten to post! We are finally almost all feeling better at my house. Wahoo! You all know what that means, right? More projects! Yay!

Today's project is actually one that I finished a couple months ago and has been working hard for us ever since! I'm not sure about you, but our bathroom counters tend to get cluttered really quickly. Hair ties, jewelry, hair products I haven't put away yet... You name it, it gets left out on the counter in a rush. I had to stop the madness and get some sort of organization going on!


I've had two little glass vases full of Q-tips and cotton balls out on our counters for years and love them. I think that was literally the very first idea I saw on Pinterest and copied! I wanted to keep those vases, but add a tray to ground them and give me space to set my jewelry and a bottle or two of frequently used products.

I was planning to DIY a little tray, but ended up finding an unfinished wood tray at Michael's for only a couple dollars after using a coupon. Score! I filled any rough spots and wood grain, then sanded it down nice and smooth.


After I got it all prepped, I gave it a couple coats of gray spray paint. Clearly, I'm not a good photographer while spray painting. That, or I really wanted to show you my hand. #notahandmodel


Now comes the blogger fail... I took a picture of the next step, but it has vanished! I can't find it anywhere. Thankfully, it's pretty self explanatory. I cut a piece of gray and white striped wrapping paper to fit the bottom of the tray, brushed some Mod Podge to the bottom of the tray, then working from one side to the other, gently laid the paper down, scoring it with a credit card along the way to get any air bubbles out. After the paper was completely down, I brushed a layer of Mod Podge to the top of the paper to give it a water resistant seal.


To further finish off my tray, I attached two decorative handles to the sides. I knew that I wouldn't be moving the tray except to clean, so I took the easy, lazy way out and glued the handles on. #rulebreaker  If you attach yours the normal, correct way so you can actually use the handles, be sure to sink your screws so that the tray lays flat on the counter.


I love that I have a designated dish for my jewelry when I'm in the shower and having the cotton balls and Q-tips out is super handy! It's also a great spot to leave my facial moisturizer out without it looking messy. Of course, nothing will help my continual cycle of finding a forgotten bobby pin in my hair while shampooing and trying to throw it over the shower wall and make it onto the counter. It always lands in the sink. Ha! Some people never learn...


What are your bathroom organizational tricks and tips?

Product Sources: 
Tray- Michaels
Handles- Lowes
Wrapping Paper- Home Goods
Square Vases- Walmart circa 2009
Jewelry Dish- World Market (only $1.99!)
Flowers- TJ Maxx

Linking up with Savvy Southern Style, Remodelaholic, and many other awesome blogs!

Tuesday, October 20, 2015

Bright and Cheery Playroom Reveal


Guess what today is?! Playroom reveal day! Cue celebratory music and confetti!!! 
We moved into our current house about 3 1/2 years ago and this was one of the first rooms I started working on. Thankfully, I started blogging as soon as we moved into this house, so I got to document each project along the way!

I'm a believer in letting rooms like this evolve over time and not rushing the process. It may have taken us three years to finish, but we were able to implement storage and organizational pieces into the room that really make it function beautifully for us! So, let's take a tour, shall we? I included links to each individual project post along the way!

Here is the view from the hallway. The built-in was already done when we purchased our home. We've organized it inside and out, refinished a chair for it, and installed a bulletin board (tutorial coming soon!) to make it function well for us.


Little Man colors at this desk for hours! We keep his crayons, colored pencils, and a basket of blank paper on the desktop for easy access. We also have a mail sorter hanging on the side of the bookshelf for him to put his finished drawings which really helps keep his desk clear. Most of the time. ;)


We really thought through how to organize our kids' paperwork and the built-in cabinets. The solutions we came up with are working out really well!


Looking to the left, you'll spot our cozy reading chair corner. The chair used to be in the kids' nursery, but we repurposed it for the room, adding a cute pillow to liven it up.


I love the curtains that we found at Lowe's for this corner and had a friend add the pom-pom border to the bottom!


The same friend (Thanks, Betsy!) took a pillow design I dreamed up and made it come to life for me!


Looking to the left, you'll spy our gallery wall and book ledges. I can't sing the praises enough of book ledges for kids! They can actually get the books out and clean them up independently! #winning 


I switch out the books every now and then to keep it fresh. 


We're still loving the gallery wall we created a couple years ago!


Little Man created the elephant art and the fingerprint animals a couple years back. I'd love to use the same method I used for the elephant to create a different animal with Little Girlie and add it to the gallery!


Turning even more to the left, you'll find our closet that we painted, added additional shelving, and organized. We've switched out a few of the baskets and moved the printer to the office, but for the most part, it looks the same. 


Now let's look at the right half of the room! See that striped wall? That was the first project we did in here 3 years ago and we still love it! It's such a fun, playful addition! And I have an addiction to stripes, but we don't need to mention that. ;)


The bookshelves stumped me for years, but I finally got them arranged in a functional, yet cute way! 


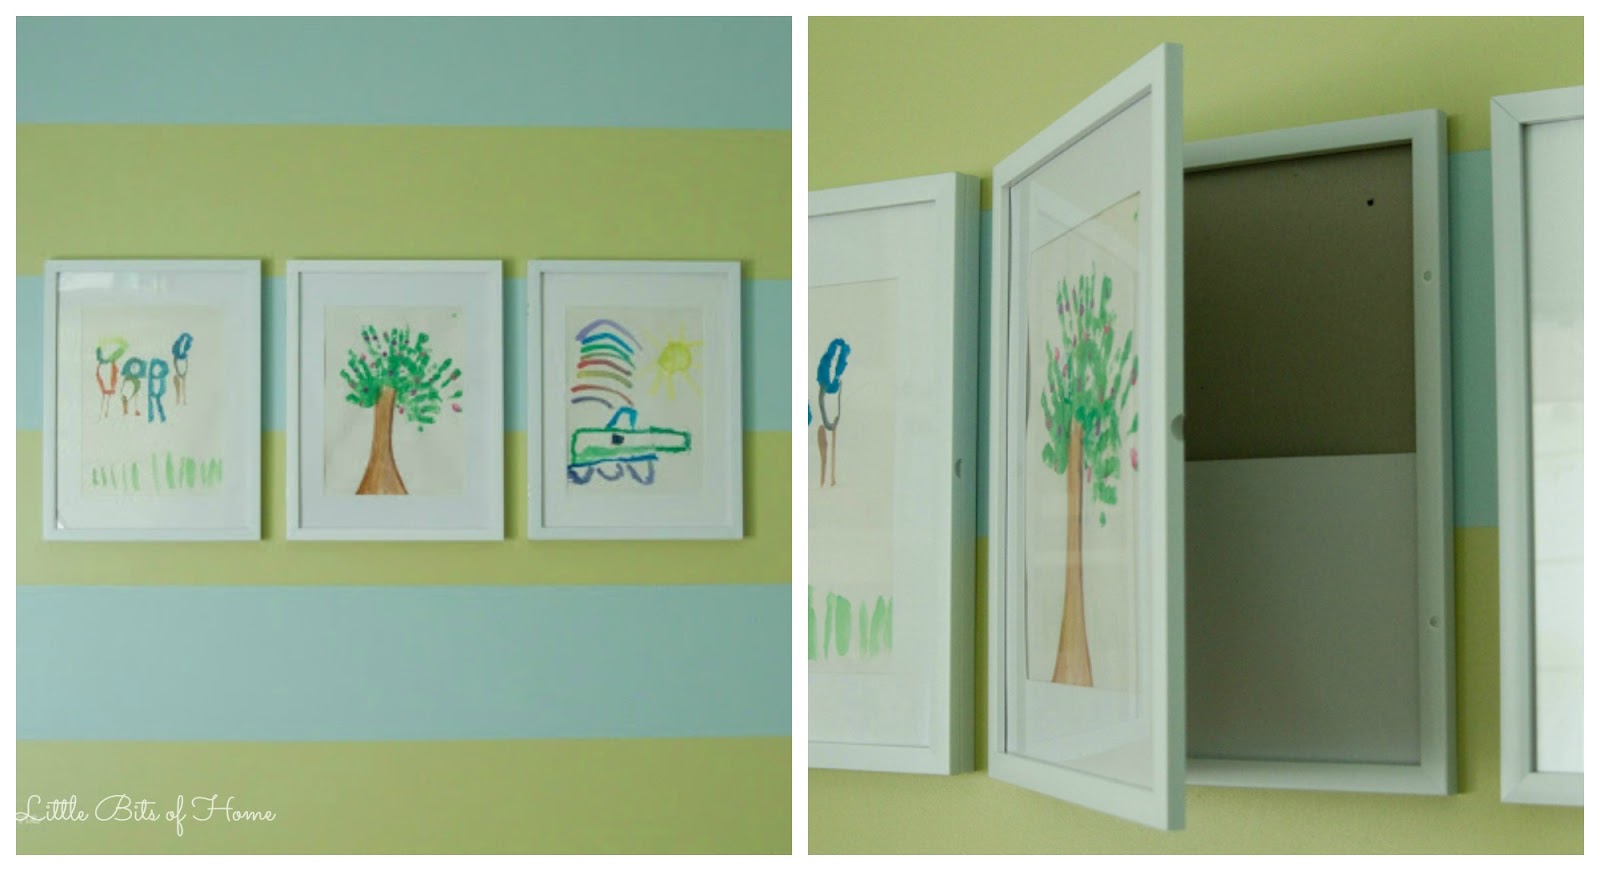
We added frames to display our kids' masterpieces that open up, allowing us to easily switch out the artwork.


Looking to the far right side of the room, you'll find the Hot Wheels parking garage we made recently. It's working out great and the kids love it!


Just a few more details from around the room...

And now the best part! Before and after comparisons! Ready to see how far we've come in 3 years?!

Here's the befores from right after we moved in next to the afters with how it looks now!
I have no explanation... ;)
Clearly, we had just moved in and thrown things into the closet while we were getting settled. #facepalm
Here's the striped wall before and after. We stored some of the larger toys in the kids' closets, moved the workbench to the garage next to Daddy's (so cute!), and parked the shopping cart in the bottom of the playroom closet. Shhhh, don't tell her, but we're building Little Girlie a kitchen for Christmas and it will go on this wall!
And that's a wrap! We're so happy with how it turned out! All of the sweat equity paid off! 

To see all the playroom posts , click here!


Tuesday, August 18, 2015

Playroom Progress: Organized Cabinets


Hope you all had a great weekend! I spent the weekend at the lake with a couple of my favorite friends and it was mar-vel-ous! Huge thanks to my hubby for staying home with the kids so I could get away!

I'm inching across the finish line in the playroom and am so excited about my latest project! When we first moved into this house 3 years ago, we put a bunch of random things into the playroom built-in cabinets, intending to organize it at some point when we got settled. Well, that some point apparently never came, because here's what it looked like until last week.


Scary, right?! Even with the doors closed, you could tell there was chaos lurking behind the frosted glass...

I finally got up the gusto to get a handle on the crazy and emptied it all out. I purged A TON and only kept what we really use and need. Ready to see what it looks like now?


Way, way, waaaaay, better!

As you can see, I moved the shelf up to accommodate inexpensive square storage bins that I picked up at Target. I used the square bins to store paints, Play-Doh, household tools (our garage is detached, so we keep a small set of tools in the house for easy access), and household items like batteries and the pencil sharpener.


I labeled the bins with chalkboard labels that I found in the Target dollar spot. Aren't they cute?! A total steal!


On the top shelf, I reused some plastic storage bins I had on hand to store our user manuals, my acrylic and oil paints, and my craft paints.


To keep the clear bins from looking messy, I slid a piece of cute scrapbook paper in the front, then popped on the lid. I finished off the bins with chalkboard labels.


So much neater! I love how the turquoise bins pick up the turquoise accents around the room!


Gotta love a good before and after!


Next time you see the playroom on the blog, it will be for the grand reveal! Hooray!


Linking up to Remodelaholic and many other awesome blogs!
Related Posts Plugin for WordPress, Blogger...