Note: This is NOT a sponsored post! Also, please excuse the horrible pictures. The upstairs hall has zero natural light and is dark and shadowy. Most of the pictures in this post were taken by my phone or worse...at night with my phone. Ugg! ;)
Guess what? I painted the stairwell all by myself! Without hiring a painter! I'll admit that I'm ridiculously proud of myself for accomplishing this. I have droned on and on to my husband about it multiple times. Basically, I geek out about it every time I go up or down the stairs. You'd think I just landed a rocket on the moon. :)
In our old house, we took one look at the high stairwell and called our painter. He was reasonably priced and did a fabulous job! No regrets there. However, this time around, I knew that the money to hire a painter would not be in the budget for a long, long time. My options were either wait another year or two or figure out how to paint the stairwell myself.
I've been working on a gallery wall for my upstairs hall and didn't want to hang it on dingy, old paint, so the gears in my brain started turning. I remembered a little edger gadget I picked up on a whim a few years ago that I enjoyed using. I had recently noticed the new models were improved and could accommodate an extension pole. That was my light bulb moment! Behold... the $5 gadget that allowed me to paint my stairwell by myself without hiring a pro or needing to buy a special ladder for the stairs!
Image Source: Lowe's
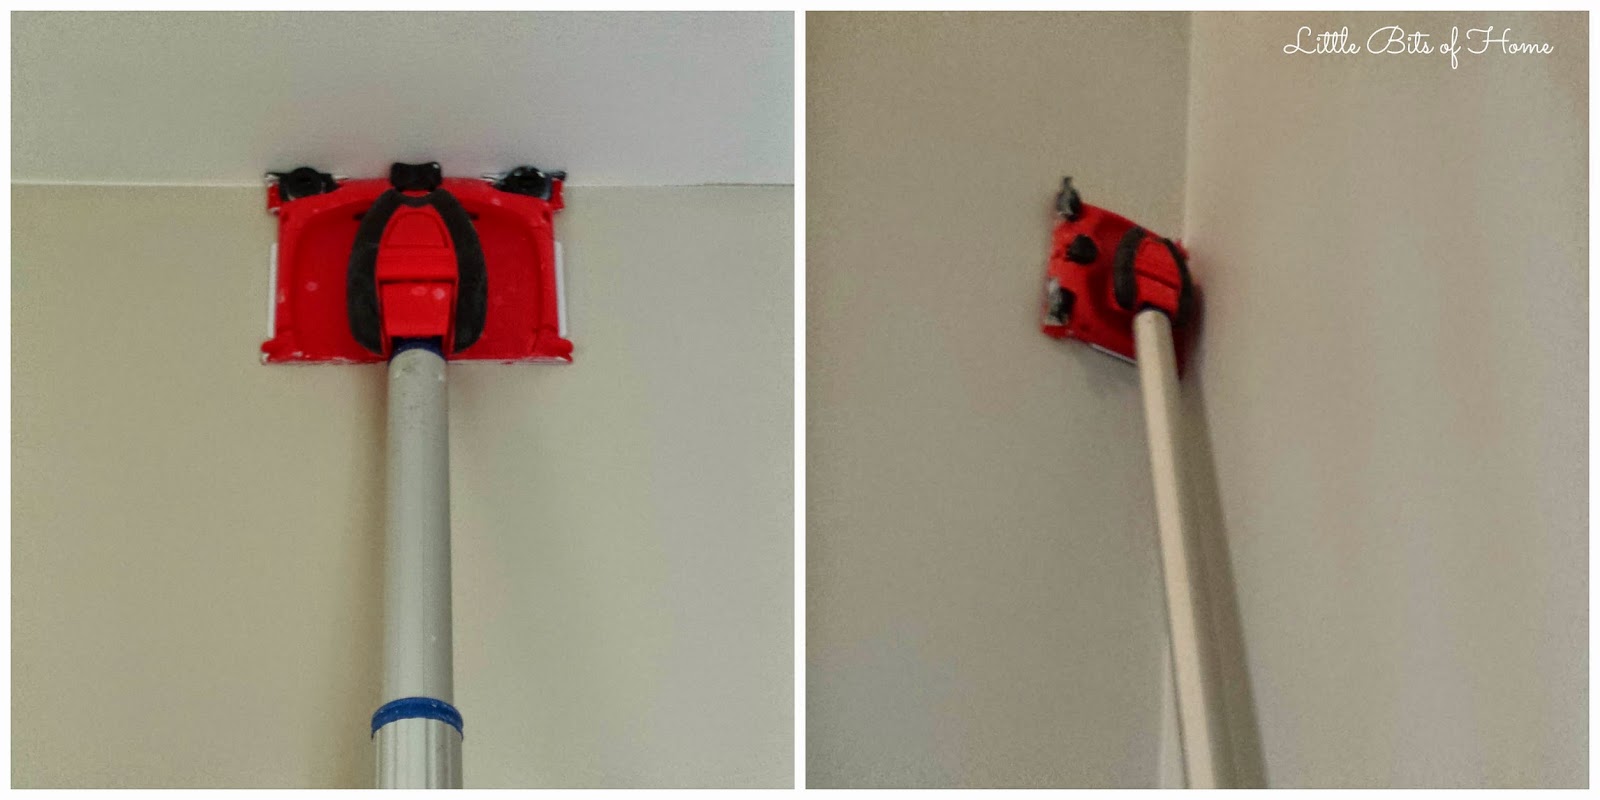
Not only can the new model attach to an extension pole, it swivels all around and now it has two little guards at the top that keep the paint from smearing on the ceiling, so there is no need for painters tape! My biggest holdup with painting the stairs was that it was too high (we don't have a stair ladder) and I wouldn't be able to tape off or cut in. But, with this little gadget, I was able to cut in without needing a ladder or tape!
I taped off the baseboards and door frames then cut in the bottom portion of the walls with my paintbrush. Then, I used the edger to cut in the top edge of the walls, as well as along the sides of each wall. When I did the sides, I turned the edger backward so that the guards were out of the way and I could get paint as close to the corners as possible. Like so...
A couple quick edging tips:
-Practice a few times first to get a feel for the amount of pressure to apply to the edger and how much paint to use. I edged the walls in my hallway first, then edged the stairwell once I was plenty comfortable with the edger. It's very easy to use, but it was helpful to get really comfortable with it before using it while standing on the stairs with it extended 8 feet above my head. ;)
-The guards flip up so they are out of the way when you dip the edger in the paint. Occasionally, if I got too much paint on my edger, when I'd flip the guards back down, they would get a bit of paint on them that I'd need to wipe off. No biggie, but something to be aware of.
-I found that after I dipped my edger, it was helpful if I ever so lightly ran it across the edge of my paint pan to get off any excess paint.
After the cutting in was done, I stood on the stairs or on the landing and rolled using an extension pole. You know you're insanely jealous of my painting attire. ;)
For the corners, I got really high tech. I duct taped my paintbrush to my extension pole. I told you it was high tech! Haha!
If this method is a little too, um, "rustic" for you, look what I found! It's a corner painter made by Shur Line in the same line as the edger! And, it can attach right to your extension pole! It was $5, so I passed and just did my duct taped paintbrush thing. I know, I'm cheap. But, either way will work!
I won't lie, it was labor intensive and a bit tedious, but it saved me a bunch of money and allowed me to check the stairwell off of my list!
I used the same Benjamin Moore Gray Owl paint color I used in the
living room, but I had it lightened by 25% because the hallway is so dark. I didn't want it to look really dark with all the shadows. Lightening it by 25% was the perfect amount--it appears to be the same color as the living room, even with all the shadows.
Ready for a little before and after action?
Before...
After!
I'm giving that light and those gold doorknobs a major stink eye! They're on the to-do list!
Next item on the stairwell/hallway agenda? Hang a gallery wall! I already gathered all the frames and have the layout figured out, but I'm still working on gathering photos and artwork. I'm hoping to have it ready to show you next week!




 Posts
Posts





